Purchase and import SSL certificate on Fortigate Firewall :

Why SSL ?

A signed SSL certificate can be used when configuring SSL VPN, for administrator GUI access, and for other functions that require a ssl certificate.

N.B : Before creating a certificate, you must have a registered domain. With a valid FortiGuard subscription.

Steps :

Follow these instructions to purchase, import, and use the signed SSL :

1.) Generate a CSR on Fortigate, You can now open the CSR with any text editor (e.g., Notepad) and copy-paste its contents, including the BEGIN and END tags during your SSL order.

2.) After the CA validates your CSR, it will issue the SSL certificate via email in an archived ZIP folder. Download the folder to your computer and extract its contents and finally Import the signed certificate into your FortiGate. There should be two CRT files: a CA certificate with bundle in the file name, and a local certificate.

3.) Configure your FortiGate device to use the signed certificate

Importing your SSL Certificate to Fortigate:

Log into your FortiGate System.

Browse to System > Certificates.

Select Import > Local Certificate.

Browse to the location and path of your SSL certificate.

Choose the local certificate (.crt) and Click OK

Now the status of the certificate will change from PENDING (Which was showing pending since the csr generation) to OK.

Importing your Intermediate CA:

Browse to System > Certificates.

Select Import > CA Certificate.

Browse to the location and path of your Intermediate CA certificate (.ca-bundle file), if required you can even convert the .ca-bundle file to .crt before importing the same.

Click OK.

Now your Intermediate CA should be under the CA Certificate section of the certificates list after the successfull import.

Configuring your FortiGate VPN to use Signed certificate:

Login to FortiGate System then Browse to VPN > SSL-VPN Settings.

In the Connection Settings section under the “Server Certificate” drop down select your new SSL certificate.

Click Apply

You have configured the Foritgate VPN to use the new SSL certificate.

To change the certificate that is used for administrator GUI access in the GUI:
  1. Go to System > Settings.
  2. In the Administration Settings section, change HTTPS server certificate as needed
  3. You can select the new ssl certificate from the drop down and Click Apply. You will be logged out of FortiOS and then you can access the admin GUI with the new certificate.

Ref :

https://docs.fortinet.com/document/fortigate/6.2.15/cookbook/825073/procure-and-import-a-signed-ssl-certificate

https://www.sectigo.com/resource-library/install-certificates-fortigate-ssl-vpn

ADFS Service Won’t Start, How to Troubleshoot ?

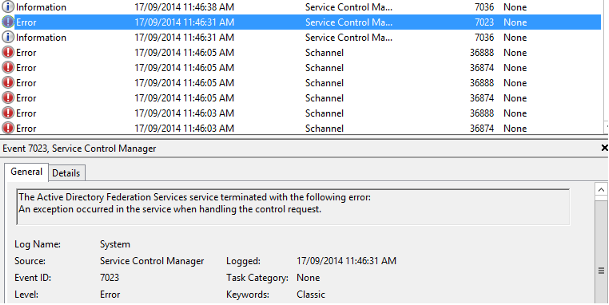
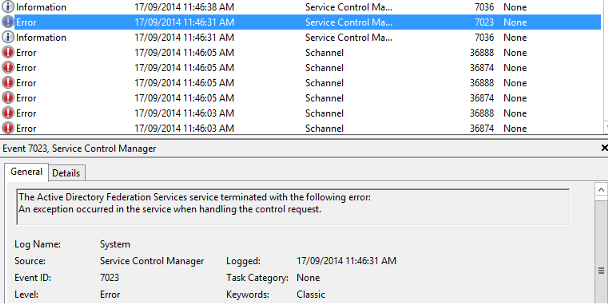
The ADFS won’t start for unknown reason and I got this error message when I looked at the event viewer:

The Active Directory Federation Services service terminated with the following error:

An exception occurred in the service when handling the control request as shown in the image below.

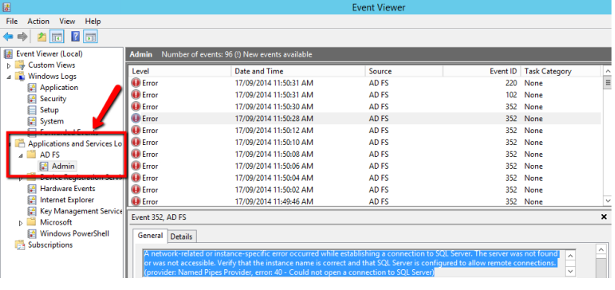
The error message is seems to be generic exception message without any further details provided. After a quick research and looking around at the event viewer, I found more descriptive error message on: Applications and Services Log>AD FS>Admin

The error message described the connection to SQL could not be established, as my practice ADFS setup is using internal database, it turned out to be the Windows Internal Database service is stopped.

Fix :

Open services.msc, search for windows internal database and start the service.Once you’ll find the windows internal database service is up and running, Finally start the ADFS service again, which should start successfully without any issues. Best of luck 🙂

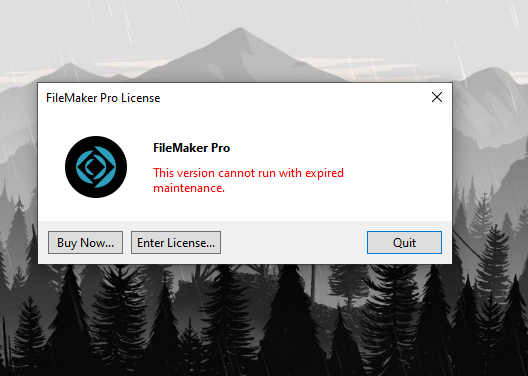
After upgrading the Filemaker pro version from 19.1 to 19.5 getting the error “This version cannot run with expired maintenance”

Fix1 :
As the error shows “version cannot run with expired maintenance” means the existing license got expired, so just enter the new license.

Fix2 :
If you have a previous version installed, but with this certificate expired error, the solution is as follows:

Go to the : Users / Shared / FileMaker /FileMaker Pro / 19.0, Just delete the 19.0 folder, then install the updated FM version . When you run the new FM app, it will ask you to enter the serial number so enter the new serial number and start working.

For npm dependencies(Nodejs), PowerShell is stuck after installing VS Build tools and it says it is still waiting for installer log file to install python?

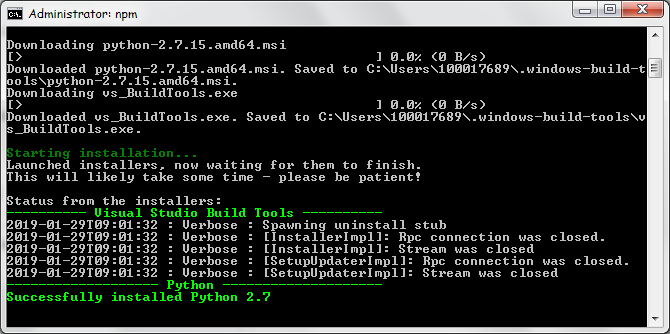
While running the “npm install –global –production windows-build-tool” and installation got stuck after “Successfully installed Python 2.7” as shown in the image below:

Fix:

1.) As the first fix, installing the build tools via Chocolatey instead (Run command prompt as Administrator):

choco install python visualstudio2017-workload-vctools -y
npm config set msvs_version 2017

2.)As the second workaround ,I installed the 4.0.0 version then ran the original one as follows :

Run the command-prompt as administrator and then try the below commands:

npm install –global –production windows-build-tools@4.0.0
npm install -g –production windows-build-tools

Completed !!

How to solve “CreateFile error 32 when trying set file time” Error During Oracle Installation

The reason of the error “CreateFile error 32 when trying set file time” is the antivirus. It’s not possible to continue with the installation or complete the Oracle installation if the error message occurs as shown below.

Fix :

Just disable the antivirus program during the Oracle installation. After disabling the antivirus program, start the installation again to install the Oracle successfully.

Fix 2 :

If you run into this error while installing through command prompt, then it may be a Windows permissions issue as well. So simply restart your Windows Command Prompt in Administrator mode and re-run the installation 🙂

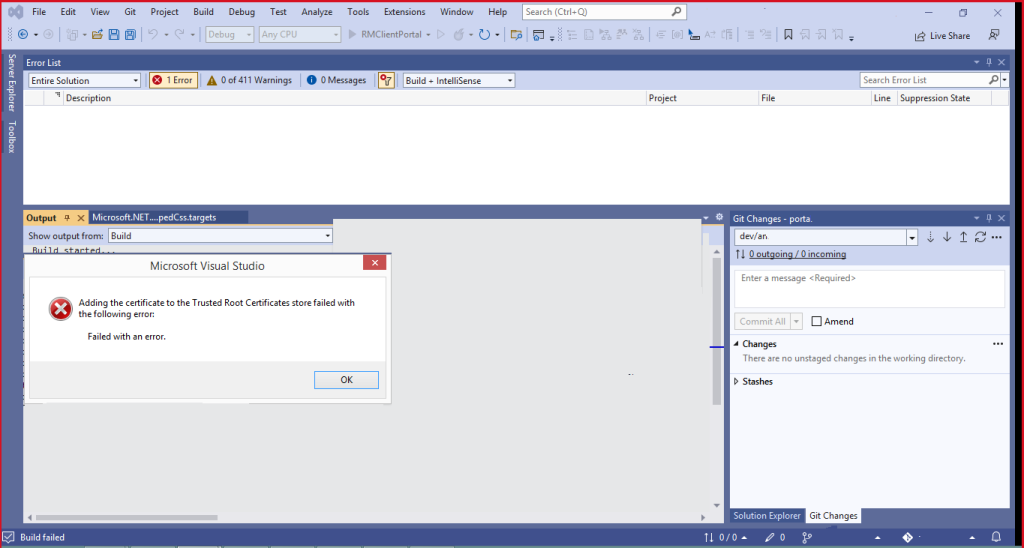
An exception has been encountered. This may be caused by an extension in Visual Studio :

Error image

Fix :

All you have to do is : Extensions > Manage Extensions > Updates > Update All/Update

Also you can find out and disable the only extension, which is creating the problem

Updating Visual Studio itself (if an update is available) is also advised.

NOTE : The Extensions menu is between Tools and Window.

Finally, Restart the visual studio and the roblem will resolve. Hope this will help others.

HAXM Installation Failed message while installing Android studio

HAXM Installation Failed message while installing Android studio :

The Android Studio Installs Intel HAXM when you install Android Studio. But you may get the HAXM Installation Failed message because of the following reasons :
1.) Android emulator is already running
2.)The processor is not Intel-based
3.)Unsupported OS
4.)Hyper-V Manager must be disabled
5.)Virtualization must be enabled in Bios ( VT-x )
6.)The PC must support Virtualisation
7.)Antivirus (Avast) may interfere with HAXM Installation

While starting Android studio shows “HAXM is not installed on this machine ” so you can install like mentioned below :

Open SDK Manager and download Intel x86 Emulator Accelerator (HAXM installer) if you have not.

Option 1: Go to Android SDK Folder –> Extra –> Intel and double click on HAXM installer and install it manually.
Option 2: If you do not have latest version of HAXM then you can open sdk manager in android studio and download it. Go to Android SDK Manager (Tools -> SDK Manager) and select SDK Tools. You will find the Intel x86 Emulator Accelerator HAXM installer listed here. Select it and click on OK.

Error :
In my case,i got the HAXM Installation Failed error as follows :

Fix:
Disable the Hyper-V Manager did the trick for me.

Hyper-V is another Virtualisation technique just like Intel HAXM. You cannot use both at the same time. Hence, It is necessary to Disable Hyper-V. You can follow these steps to disable Hyper-V

  1. Go to Control Panel -> Programs and Features -> Turn Windows features on or off
  2. From the window disable Hyper-V options
  3. Reboot your machine

Disabling the HyperV fixed the HAXM Installation Failed issue for me.

Oracle SQL Developer error while trying to export any result queries

Are you getting the following error when trying to export any result queries on Sqldeveloper ??

Fix : Open the SQL Developer installation folder, locate the sqldeveloper.conf file and finally add the below line before restarting the Sqldeveloper :

AddVMOption -Dide.user.dir=D:/SQLDeveloper/.sqldeveloper

Works fine now 🙂

N.B : Replace the above sqldeveloper path with your sql developer installation folder path

Failed to unlink socket file /tmp/mongodb-27017_MongoDB_Error

After the successful installation,you can start MongoDB.

You can start the mongod process by issuing the following command:

$ sudo systemctl start mongod

If you receive an error similar to the following when starting mongod:

i.e Failed to start mongod.service: Unit mongod.service not found.

Run the following command first:

$ sudo systemctl daemon-reload

Then run the start command above again,it should start

To verify that MongoDB has started successfully run :

$ sudo systemctl status mongod

You can optionally ensure that MongoDB will start following a system reboot by issuing the following command:

$ sudo systemctl enable mongod

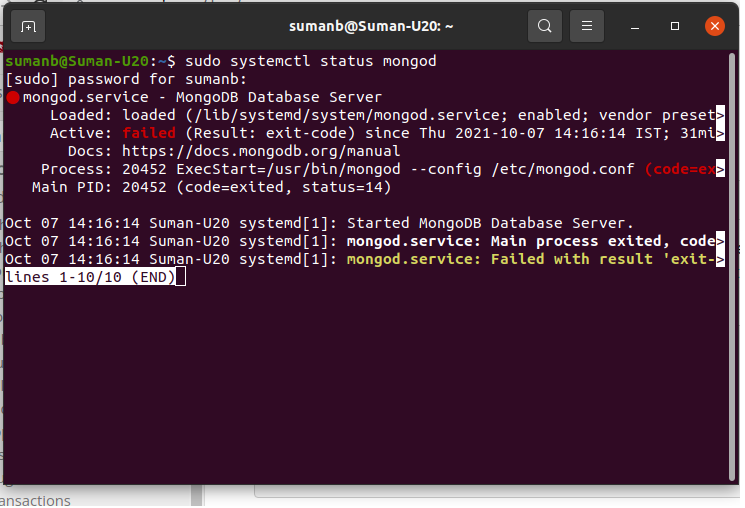
If you receive an error similar to the following image, when starting mongod:

As the command is unable to start the mongod process, review the /var/log/mongodb/mongod.log file, to find out the error messages and you can findout the “failed to unlink socket file /tmp/mongodb-27017 “ error.

Solution :

To fix the error, just delete the /tmp/mongodb-27017.sock file manually and start the mongod process. Now you can check the /tmp/mongodb-27017.sock permission again, the ownership is changed to the “mongodb” user as shown below :

Common error :

While running $ sudo apt-get upgrade, Ubuntu helps to upgrade the MongoDB automatically, and changed the mongodb-27017.sock ownership to root, and normally we start the ‘mongod’ process with user “mongodb”, causes the above error so we need to change ownership back to mongodb user.